Showing posts with label comfort food. Show all posts

Thursday, January 30, 2014

Savory Snowman Soup

Snowbert - Snowberta - Snowthirda
It’s a snowy blustery day here in western Montana, but it’s January 30th and this is the first real snow we’ve had since the first of the year.  It’s a perfect day for Savory Snowman Soup!

Savory Snowman Soup is something I made to peek the curiosity of young and picky eaters.  How could they turn down Snowman Soup?  Unlike the recipes for hot chocolate on the internet that call themselves by the same name, this is a “real” savory soup.

This soup starts with a rich chicken broth. I always make broth from the carcass of my roasted Hutterite chickens because this is another whole meal you would throw away if you don't get this last bit of goodness out of it first.  If you do this too, it’s ok to add the little bits of meat you pick off the bones to the soup. You can also use canned stock or broth or Better than Bouillon vegetarian no-chicken to make the broth if you prefer.

Savory Snowman Soup
Cutting carrot noses.


6 cups Chicken stock or broth
1 medium onion finely chopped
1 teaspoon olive oil
2-3 cloves of garlic mashed and minced
½ teaspoon thyme
2 cups finely diced potato
2 cups carrots peeled and julienne cut

15oz can of black beans rinsed well and drained
4 oz can diced mild green chilies (optional)
1 pint half and half
Salt and pepper to taste

Dice your onion and sweat it in the olive oil for a few minutes until it becomes translucent.  Add the broth and other ingredients, except the beans and half and half, and simmer for 20 minutes or until the potatoes and carrots are tender.  


Snow Bunnies love Snowman Soup
If you would prefer a slightly thicker soup, you can add a few mashed potato flakes or mix a couple tablespoons of organic cornstarch with a little water and stir that into the soup and let it cook for a few minutes to thicken.

Next, add the well rinsed and drained black beans and the half and half.  
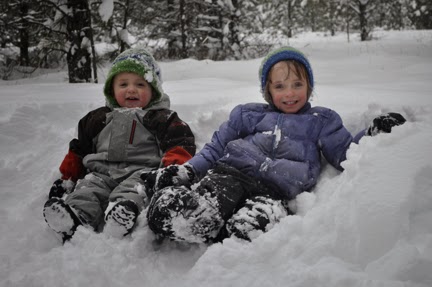


Grammie's Snow Bunnies
Taste the soup for seasoning and get ready to serve to curious onlookers.  You can garnish with a little chopped greens if you prefer and a nice accompaniment is soft bread sticks for dipping.

Stay warm and Enjoy!

Thursday, December 26, 2013

Casserole 101

Casserole 101
Sometimes I think the casserole has gone the way of Plum Pudding -- not too many people are cooking them anymore.  A lot of people think "casserole - 1970's - Betty Crocker" but, that's crazy because casseroles are usually easy to put together, flexible, and you can do them ahead so you aren't scrambling around in the kitchen at the last minute.  

The definition of a casserole is "flexibility".  It is a one pan meal cooked in the oven, usually with a brown and crusty top, and may consist of (part 1) rice/grain, potatoes, or noodles, combined with (part 2) vegetables, (part 3) meat or beans, and (part 4) some type of sauce.  Measurements in a casserole may be approximations. For example, you've got 2 cups of cooked rice or 2 1/2 cups, throw it in, as long as the ingredients are somewhat proportional there is no exact science.  I'm going to give you a "flexible" recipe to experiment with.  Let me know how it goes for you and what you did to make it your own.  By the way, if you aren't feeling inventive, it's ok if you just follow what I did because it was delicious!

Casserole 101

Part 1:

For my casserole I used rice.  I was in a bit of a hurry so I used jasmine rice, but I could have used quinoa, or brown rice, or any cooked grain.
I cooked 1 cup of rice in 1 3/4 cup of water and put that as the base in my oil sprayed dish.

Part 2:
We love brussel sprouts and I had picked up a large bag from the co-op for the holidays.  I cleaned and boiled them until they were still bright green, but almost done.  I could have used lightly steamed broccoli, or chopped and sauteed kale, and I could have added sauteed onion to any of these.

Part 3:
OPTIONAL for vegetarians or those who don't want meat, use your favorite protein - be it beans or tofu and it's perfectly ok to skip the meat layer in any casserole.  I had a little left over ham so I diced that up for my meat layer.  It ended up being about a cup of diced ham.  This could have been chicken, beans, ground beef, prosciutto, or none of these.

Part 4:
The sauce.  I chose to make a simple white sauce.  Place 4 tablespoons of butter and 3 tablespoons of flour in a skillet stirring constantly over low heat to make a roux.  
Making the roux.

For a white sauce, you do not want to brown the roux. When it's bubbly as shown in the picture, add 2 cups of milk all at once while stirring until it comes back to a boil and has thickened to a nice consistency.
 Add salt and pepper to taste 1/2-1 teaspoon of salt and a dozen grinds of fresh black pepper.  Herbs make a nice addition to the sauce as well.


Putting it all together.


After you have layered up part 1-2-3, pour your sauce evenly over the dish.


Regarding the sauce, once you have created that, you could add grated Cheddar, Parmesan, or Asiago to the sauce and allow that to melt before pouring.  This would combine well with a pasta layer to make a layered mac and cheese type casserole.


I wanted a lighter flavor for this version, so added a sprinkling of Asiago cheese mixed with a tablespoon of bread crumbs to the top of the casserole for a crusty-cheesy-browned top. 

Everything in the casserole is cooked so the baking time is just to heat it through and bring everything together.  Bake the casserole in a 375 degree oven for 30 - 45 minutes or until the top is browned and bubbly.  If you've made it ahead and had it refrigerated, it might take a little longer to heat through. Allow 60 minutes. Let the casserole cool slightly before serving big squares.


It came out just as tasty as it looks.  Served with a little spinach side salad, it made an impressive and delicious dinner.

I turned leftover ham and brussel sprouts into an entirely new dinner dish.  I could have reheated them and thrown them on a plate with the rice, but this was so much more appetizing and it made that little bit of ham stretch into 4 meals and no one felt slighted.

Here's a couple of ideas for different versions you might want to try for Casserole 101:

Mexican - rice - well drained, diced tomatoes - taco seasoned ground beef and/or black beans - top with a sauce to which has been added a cup of grated cheddar or a Mexican cheese mix - finally top with tortilla chip crumbs.

Broccoli/Cheddar - pasta of your choice, spirals or elbows work well - top with a layer of beans (can be white, red, or black) - lightly steamed broccoli - cheddar cheese sauce, made by adding a cup of grated cheddar cheese to the white sauce - top with bread crumbs.

Quinoa/Kale - quinoa - saute 1 bunch of kale, 1 sweet onion, 2-3 cups chopped green cabbage - optional meat layer of ham or Italian sausage - simple white sauce with 1 tsp dried basil added when it is finished - top with 1/2 cup Parmesan cheese mixed with 1/2 teaspoon Italian herbs and 2 tablespoons of fresh bread crumbs.

Please feel free to share your 4 part combinations to inspire everyone.
Enjoy!


Thursday, February 28, 2013

Regional Cuisine - Goetta

Is regional the same as local?  I've been thinking about regional foods lately and why they have remained regional and not spread around the country like the people we meet.  Regional recipes seem to have an ethnic or cultural influence and be made with locally obtained ingredients.  Like goeduck in the Pacific Northwest, lobster rolls in New England, fried diamondback in Texas, and Rocky Mountain oysters in Montana...  but ok, I'm not going there.  For the most part, all of these regional foods are based on locally obtained ingredients, and that's great, Right?

There's a regional food that I grew up with that has always been a puzzle to me.  It's not based on any locally obtained ingredients or to my knowledge, any ethnic or cultural traditions.  I have wondered over the years why it has been such a well kept secret, where it got its start, its rather odd name, and why it has never escaped from its origin.

As a child, I stood by my Grandmother while she stirred a huge pot on the stove and we always had it as a sort of porridge that first night for dinner.  It was so tasty!

According to anything I can find on the internet, it originated in Cincinnati, Ohio in the late 1800's, of German-American heritage.  Well, I think that just means no one really knows, because my Grandfather was French and my Grandmother was Swedish.  Also, if you ask a person from Germany, they have never heard of it.  The internet also says it originated as a peasant dish to stretch out servings of meat.  I can somewhat picture this convenient logic, but I still don't totally believe that either, because when we make stew, we don't say it's to stretch out the meat.  I actually think they made it because it was delicious.  

I hope I've got your interest by now, because I'm going to share my age old secret recipe handed down from my Grandmother. Goetta (pronounced get-ah) is the regional food from Cincinnati that I'm talking about.  I also want to make sure that you understand that there is NO relationship to Scrapple.  Scrapple comes from the Pennsylvania area and is made with cornmeal and parts of pigs that were destine for the rendering plant.  There are NO similarities here.

GOETTA

1 to 2 pounds pork - as in a fresh pork shoulder or any lean pork 
1 to 2 pounds beef - as in a chuck or round or rump roast

Remove any obvious fat and brown the meat on all sides and then add 3-4 cups of water, a teaspoon of salt, and cook until fork tender.  (My grandmother cooked hers in a pressure cooker and that's what I do too.  About 45-55 minutes in the pressure cooker.)  No pressure cooker?  You can braise the meat in a crock pot on medium for 5-6 hours or in a covered dish in the oven 300-325 degrees for 2-3 hours.  
Braising requires that the meat be slow cooked in liquid until tender.  Add water as necessary to keep the meat from drying out and have lots of good juices.

Once tender, remove the meat from the juices and allow it to cool completely. You can even prepare the meat the day before and refrigerate.
In the photo above, I had actually cooked extra and reserved some of that for another recipe.  I finely diced about 11/2 pounds of each meat.

Once again, I'm going to give you an alternative to cooking this.  My Grandmother and I until just recently always cooked it in a big pot on the stove.  I've adapted my recipe to a crock pot method that takes a lot of the work out of it.

In a crock pot (or large, heavy bottomed pot on the stove top), add the chopped meat along with the following ingredients.

3 cups of organic steel cut oats ( these are knows as pinhead oats to the old timers)
6 cups of the broth from the meat plus water to make the 6 cups
2 medium onions diced finely
2-3 bay leaves
1 teaspoon dried thyme leaves
3 teaspoons salt - it's important to add enough salt or the oats will taste bland

Set the crock pot to high for the first 2 hours, stirring every hour and keeping the lid on.  At 2 hours, turn down to low and begin stirring every 20 minutes to half hour for another 2 hours.  Do not add additional liquid as you want it to be very thick. If it appears that it is getting too thick to stir, add only a small amount - 1/2 cup and stir in completely.  When finished, the oats should be tender and your spoon should be able to stand up in the center of the pot all by itself.

If you are doing this on the stove top, ignore all of the stirring instructions above and you will need to stir it every 10-15 minutes for the first couple of hours and more often as it thickens.  Your burner should be on low the whole time as this stuff wants to stick and burn quickly. You are also going to need to add more water because the frequent stirring will evaporate more.  Add up to an additional 2 cups of water, 1/2 cup at a time as needed.  Now you can probably see why the crock pot is so great for this.  In both methods, keep it covered with the lid unless stirring.


When the oats are tender and the entire pot is very thick, take it off the heat, remove the bay leaves, and spoon it into a couple of deep dishes to cool.  I use my rubber spatula to press it into bread pans.  Once cool, cover the pans and put one in the refrigerator and the other in the freezer.

If there's a little left over, add a pat of butter and enjoy it fresh... ummm! just like grandmother used to make.

Like I said, we used to always have a serving fresh for dinner and it's great that way, but the way it is most often prepared is the refrigerated loafs are sliced into 1/2 inch slices and fried.  (The crispy fried version is pictured at the top of this post.) Of course, I no longer fry it in the traditional bacon grease, but if you are into that, that's the way it used to be done.  I fry it in a skillet with a little organic olive oil.  It is most often served for breakfast as an accompaniment to eggs.  We used to have it for any meal with or without eggs.  A couple of slices of this and a salad make a healthy dinner as well.

The way I cook it, it has little fat, as the meat I use is lean and I fry it in very little olive oil.  It is made with organic whole grain oats, which are very good for you.  It's an old time comfort food for me.  I do hope you will enjoy it too.